Showing posts with label computer. Show all posts

How To Create Your Own Vector Cartoon Character

posted by : CarBari Sunday, April 6, 2008 0 comments

One of the most popular articles here on Blog.SpoonGraphics is how to create a vector cartoon character from a hand drawn sketch, an Adobe Illustrator tutorial covering the process of creating Captain Blackspoon.
Using similar techniques, follow this tutorial to create your own vector character; Freddy the Fish.
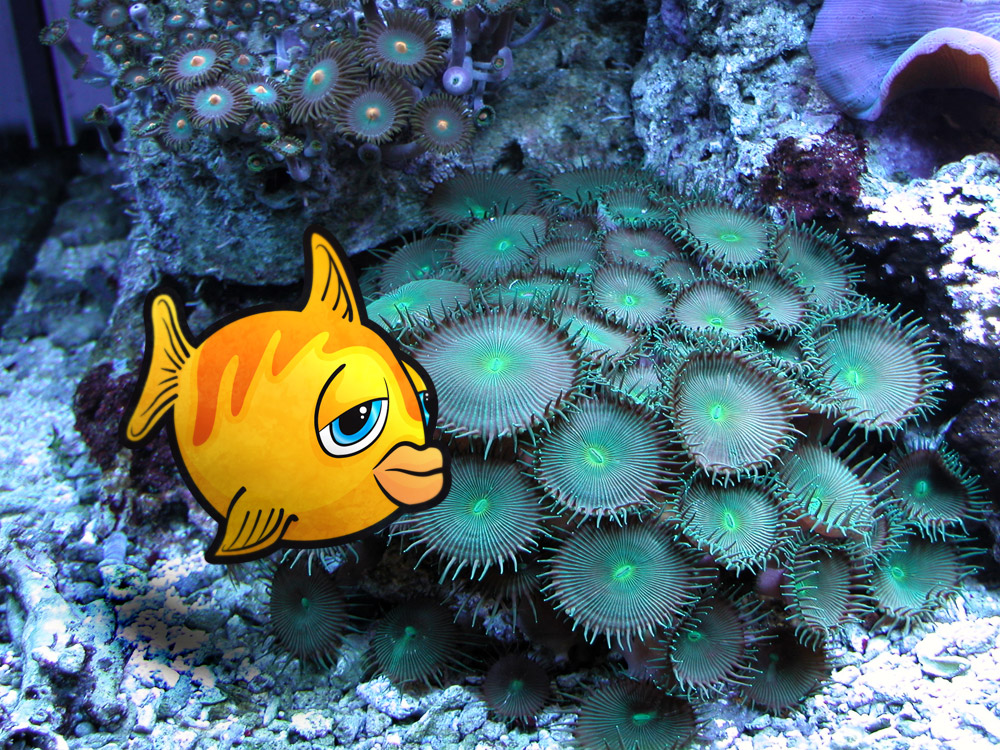
How To Create Your Own Cartoon Character
View larger version

1-fish-sketch-scan.jpg

As with Captain Blackspoon, the process starts with a hand drawn doodle which is scanned into the computer.

2.jpg

Open up Adobe Illustrator and place the scanned image into the artboard, set the opacity to 20% and lock the layer.

3.jpg

Create a new layer above the scan (name it outlines) and draw a path following the outside of the character using the pen tool.
Use the Direct Selection Tool to tweak the points of the path to your desire.
Add a thick 9pt stroke to the path.

4.jpg

Follow on the flow of the line between the eye and body with a thinner 4pt stoke.

5.jpg

The traditional method of inking drawings results in a tapered brush stroke where the pressure of the pen minimizes to a point. To create a similar effect in Illustrator we need to create a new art brush.
Draw a circle somewhere on the artboard making the size as wide as the largest line width.

6.jpg

Use the Direct Select Tool to drag the right most point outwards whilst holding Shift.

7.jpg

In the Brushes palette click the ‘New Brush’ icon and select ‘Art Brush’ from the menu.

8.jpg

9.jpg

Continue drawing paths across the detail of the character, then select the brush from the Brushes Palette. Line up the stroke with the large outline to create a smooth flow.

10.jpg

Use varying widths to the different levels of detail, where the finer lines are stroked with a 0.5pt line.

11.jpg

Repeat the process on the outline of the eyes, then create a shape with a black fill to act as the pupil.

12.jpg

Add a couple of circles to the pupil as highlights.

13.jpg

Toggle off the visibility of the sketch layer to check out the outlines so far, adjust any areas as necessary.

14.jpg

To begin adding colour create a new layer between the sketch and outlines. Select a colour swatch and roughly draw around the outline of the character, make sure not to stray beyond the thickness of the black stroke.

15.jpg

Drop the transparency of this new block of colour to see the outline of the scales pattern.

16.jpg

Bring back the transparency to 100% and fill this area with a slightly darker tint.

17.jpg

Begin work on the eyes by filling the relevant areas white using the same process of roughly drawing a block of colour around the necessary area.
Add a little more detail to the iris by filling the area with an intricate gradient rather than a solid colour.

18.jpg

Pick a hue for the lips and draw in the block of colour.

19.jpg

Draw a large area of shade on across the underbody on the character using a slightly darker tint. Correct the area around the fin where the shadow overlaps by drawing an extra area of the base colour.

20.jpg

Add more areas of shade around the eyes and lips to give the impression of a three dimensional form where the light is cast across the shape.

21.jpg

The design process could stop here, but to add a little more depth to the character use a few very subtle gradients across the blocks of colour. This will produce a gradual change of colour from light to dark giving a better impression of the shape.

22.gif

The character design is complete, but Freddy the Fish needs a home. Jump onto the internet and find an underwater scene, I found a corel scene from Stock Xchange.

23.jpg

Switch over to Adobe Photoshop and open up the scene, paste in your character and scale to size.

24.jpg

Use the Burn Tool to create a shadow on the background to help the character blend into the scene.

25.jpg

Also use the Burn Tool and Dodge Tool to add extra highlights and shadows to the character taking notice of the light sources in the image.

26.jpg

Duplicate the character layer and add a slight Gaussian Blur. Use a large, soft Eraser brush to delete out the main body of the fish, leaving just the fins with a slight blur.

27.jpg

Copy and paste from a rocky area of the background, position this over the character.

28.jpg

Change the blending mode to Soft Light and drop the opacity right down to 20%.

How To Create Your Own Cartoon Character
View larger version

Freddy the Fish is now complete with his new home.
Enjoy the tutorial? Please feel free to Digg or Stumble the page to share with others!

http://www.blog.spoongraphics.co.uk/tutorials/how-to-create-your-own-cartoon-character


Subscribe to Blog Serba Lengkap.Semuanya Ada Disini ! by Email

This tutorial will demonstrate how to take an image, in this case a woman's face, and give the appearance that it is entirely composed of vector shapes. Along the way, we'll use some fairly basic techniques, including clipping masks and displacement maps, to achieve a unique effect!

This is the image we'll be creating:

Final Image

Step 1

To begin, create a new document of pretty much whatever size you'd like. I personally prefer a wider look for this effect, but any size should work. You should however probably stick to a landscape aspect ratio, at least for following this tutorial.

I chose an image size of 720 x 480 pixels, at a resolution of 300 pixels per inch.

Once you've created your new image, fill the background layer with solid black.

Step 1

Step 2

Next, we have to find an image to work with. I chose a picture of a woman's face that I found on the stock photography website stock.xchng, however, the owner of the photo requested that I credit the website iofoto.com, so I've just put both here.

You can use an image of almost anything for this effect, but to follow this tutorial, your best bet is to choose an image similar to mine, i.e. a human face.

Once you have your image, place it into your document as a new layer. Remove everything else in the picture, just leaving the face. I've also adjusted the brightness and saturation on my image. You can preserve the entire person's head, but I personally think the effect looks better with the back of the head being cutoff, leaving just the face.

Step 2

Step 3

Duplicate the face layer, and make sure it's positioned exactly on top of the original face. Press Shift + Control + U to desaturate the layer, and then go to Filter > Blur > Lens Blur. Make sure the setting for Source is selected as Transparency, and use settings of 10, 0 and 0 for Radius, Blade Curvature and Rotation, respectively. We'll see later on why blurring this layer is necessary.

Step 3

Step 4

Before we go any further, we need to save our document again, under a different name. So, make sure the top, blurred layer is visible, and save your document as 'dispmap', or whatever you want to call it. This file will be used as our displacement map later on.

Now we need our vector shapes which will ultimately combine to actually form the woman's face, or whatever image you chose. I used quite a few different shapes from GoMedia's Arsenal Vector Sets 2 [Hooladanders] and 3 [Hooladanders 2]. You have to pay for them, but if you'd just like to try out the effect, a couple of shapes in the free Vector Pack Sample should work.

Once you have your shapes, start dragging a few into your Photoshop document. If it asks you how to paste them, choose Smart Object. How you place your objects here will greatly affect the end result. You may be tempted to just throw the shapes on any which way over your image, but you should take care to make sure they flow with the the contours of the image. This doesn't have to be perfect as some adjustments will be made later, but just randomly placed objects will not produce as good an effect. Notice how in my image, all of the vector shapes not only flow with the contour of the woman's face, but also flow in the same general direction relative to each other. Their weight is also distributed toward the front of the face, with the tails of the shapes trailing toward the back of the head. Remember, we want it to look as though these vector shapes are all gathering together and combining to form the image.

Also important to take into consideration is the number of shapes you lay over your image. While it may seem like adding more shapes will produce a more complex and intricate look, it will actually take away from the desired effect, because almost the entire original image will be visible. We want to be able to see the black background through different areas in between the shapes.

Step 4

Step 5

Now, select your first vector shape layer, and go to Filter > Distort > Displace. Leave the Horizontal and Vertical Scale values at 10, and select the Stretch to Fit and Repeat Edge Pixels options and click OK. When the file dialog appears, select the file you saved earlier as 'dispmap' (or whatever you called it) and click Open.

For anyone unfamiliar with this feature, displacement mapping takes an object or layer, in our case a vector shape, and, using another image file (a displacement map) transforms the image so that it would fit over the map. It determines this by the color of each pixel in the displacement map, with lighter pixels corresponding to what would be a higher area on a 3D model of the image. The reason we copied the original image of the woman's face and desaturated it was to allow for an easier mapping by eliminating colors. We also blurred the image because displacement mapping in Photoshop is very accurate. If we had tried it on the original image, our vector shapes would appear choppy because in reality they were mapped to the smallest bumps and textures on the woman's skin. Blurring the image slightly leaves only the smooth contours of the woman's face, allowing for our vector shapes to maintain their smoothness but still conform to the face.

Step 5

Step 6

Once you have used the displacement mapping on all of your vector shapes, you need to then duplicate your original image layer as many times as the number of shapes you have. What we need is a copy of the original image for every vector shape we have, with the copy on top of its shape in the layers palatte. When you're finished arranging everything, you will have alternating image and vector shape layers, starting at the top with an image layer.

Step 6

Step 7

We now need to create the clipping masks that will transfer our original image into the vector shapes. So, for each copy of the image layer in the layers palatte, right click it and select Create Clipping Mask. Don't worry if no visible changes occur; you won't see them until you make the very last clipping mask. You can tell if you've made the mask successfully if there is a small arrow pointing down in the image layer, and the vector shape layer below it is underlined.

Step 7

Step 8

Once you have made all of the clipping masks, you should begin to see the final image take shape. However, we're not done just yet. Now select the topmost vector shape layer, and add a drop shadow to it. I used an angle of 140 degrees, and settings of 10, 10 and 20 for Distance, Spread and Size, respectively.

Once you've got a shadow effect that looks good, right click on that vector shape layer and select Copy Layer Style. Then, right click all of the other vector shape layers and select Paste Layer Style.

Step 8

Step 9

At this point we've finished the final effect on the image. I added a Radial Gradient to the background to give the impression that light is coming from the left to match the general shading of the image.

Final Image

Final Image

Finally I have added some text, and darkened the neck area so it sits further in the shadows. Additionally I upped the contrast to make the image a little more eerie.

This technique can be applied to any image using any vector shapes. The key to making it look convincing is matching the vector objects to the shape, countours, and flow of the object image they're to be wrapped around. It's an odd effect, but I hope you were able to gain something from this tutorial, and good luck with your own work!

Final Image
http://psdtuts.com/tutorials-effects/creating-a-vector-composite-effect-from-a-photo/

Subscribe to Blog Serba Lengkap.Semuanya Ada Disini ! by Email

In celebration of our little vector contest I thought I would unofficially submit my own entry.

I made this animation using our Spring Time vector pack. It’s about 360Kbs, but once it’s loaded click Play to get it started, then you can press the Left or Right arrows to control the little bunny.

I’ll walk you through the process I went through to create this here game/animation.

My first step was to get the vector pack that I wanted to use. Then I imported it into Flash CS3.

Importing Dialogue Box

You can just go ahead and import everything. Then just delete anything you don’t need. I only unchecked a few groups and paths that I knew weren’t needed.

Once all the groups are imported to the stage you can go into them by double clicking on them and remove or edit them how you like. For example I got rid of the dirt path on the ground.

When everything was more or less how I wanted it, I started making MovieClip symbols out of some of the more important groups and the rest I either deleted or just left as background on the stage.

Before I wrote any code I thought it would be fun to animate the sun a little and work out how the bunny was going to hop.

For the sun I separated the face and the orange halo behind its head and over the span of 6 frames I rotated the halo just a little bit so that it would loop and look like it was always turning.

Animating the Bunny

With a little thinking ahead I setup the bunny’s animation and on the first frame I added a quick 3 lines of code to let me stop it from looping if I wanted.

With all the prep done we are finally able to focus on the code. I started off with my symbol class files (i.e. tree.as, clouds.as, and rabbit.as).

There is very little in the rabbit class. Just a boolean property called “moving” so that the small bit of code on frame one will work.

The clouds class is a different story. I wanted to be able to create a new cloud and not have to worry about what type of cloud it was or how fast it would move. So, I made my clouds class randomly child one of my four types of clouds:

public class clouds extends Sprite {

public var vel:Number;
private var c:Number;

public function clouds() {
c = Math.random();
if(c > .85){ //15%
this.y = 140;
addChild(new cloudMad());
}else if(c > .55){ //30%
this.y = 135;
addChild(new cloudCry());
}else if(c > .3){ //25%
this.y = 80;
addChild(new cloudWhistle());
}else { //30%
this.y = 100;
addChild(new cloudSmile());
}

vel = 1 + Math.random();
addEventListener(Event.ENTER_FRAME, doNext);
}

private function doNext(event:Event):void {
this.x += vel;

if(this.x > 700) {
removeEventListener(Event.ENTER_FRAME, doNext);
removeChildAt(0);
dispatchEvent(new Event(Event.COMPLETE));
}
}
}

Notice the variable vel being randomly set to a number between 1 and 2. Every frame the cloud will move to the right by vel pixels. Since the stage is only 550 pixels long I wanted to delete the cloud once it’s definitely clear of the screen. So I remove the child and the event listener and then dispatch a “complete” event so I can finish cleaning up somewhere else in my code.

The tree class is very similar to the cloud class in the respect that it handles it’s own movement. But, there is an added complexity to the trees because 1.) I want to recycle them instead of delete them (actually it’s easier then deleting them), and 2.) The trees don’t move in a straight line across the screen like the clouds do.

public class tree extends Sprite {

private var posY:Number;

public function tree(posY:Number) {
vel = 0;
this.y = this.posY = posY;
addEventListener(Event.ENTER_FRAME, doNext);
}

private function doNext(event:Event):void {
this.x += vel*(this.scaleX);

if(this.x > 700) {
this.x = -150;
}
if(this.x < -150) {
this.x = 700;
}

this.y = posY + 925 - Math.sqrt(925*925 - Math.pow(this.x-275, 2));
this.rotation = (this.x - 275)/18;
}
}

Multiplying the velocity (vel) by the scale (scaleX) will add to the illusion of depth.

In order to move my trees along the curvature of the land I first needed to find out the equation of that curve. To me the curve looked a lot like a segment of a circle, so I just needed to find the radius of that circle. To do that I zoomed out really far, drew a circle and then played around resizing it till it approximately fit the curve. In the end I got a radius of 925 (which is actually slightly too big, but it’s close enough).
Knowing that the equation of a circle is (X+xOffset)^2 + (Y+yOffset)^2 = R^2. Then the equation breaks down to Y = -yOffset + sqrt(R^2 - (X+xOffset)^2) and that’s pretty much what you see near the bottom of my code. The operator signs (+/-) are different because in flash our coordinate plane is flipped vertically.

OK! Now that I have (what tense/perspective was I writing in again?) my trees, clouds, and bunny that all take care of their own movement, it’s time I write the main code that adds everything to the stage.

Ever since I noticed that it was possible I’ve been writing all my code in external .AS files and then associating them with my document.

So, in my main code’s constructor I want to add my bunny and trees to the stage and maybe a new cloud every 5 seconds or so:

public class main extends MovieClip{
public var bunny:MovieClip;
public var treeLayer1:Sprite;
public var treeLayer2:Sprite;
public var treeLayer3:Sprite;
public var myTree:Sprite;
public var myCloud:Sprite;
public var cloudTimer:Timer;

public function main() {
addTrees();
addBunny();

cloudTimer = new Timer(5000); // Every 5 seconds without an end
cloudTimer.addEventListener(TimerEvent.TIMER, addCloud);
cloudTimer.start();

stage.addEventListener(KeyboardEvent.KEY_DOWN, keyDownHandler);
stage.addEventListener(KeyboardEvent.KEY_UP, keyUpHandler);
}
}

Of course I need to start to watch for keyboard actions too so I added the event listeners for that.

My addTrees() function has to make 3 layers of trees with different amounts of blur (also to give the illusion of depth):

private function addTrees():void {
treeLayer1 = new Sprite();
treeLayer2 = new Sprite();
treeLayer3 = new Sprite();

stage.addChild(treeLayer1);
stage.addChild(treeLayer2);
stage.addChild(treeLayer3);

var filter:BitmapFilter = new BlurFilter(4, 4, BitmapFilterQuality.LOW);
var myFilters:Array = new Array();
myFilters.push(filter);
treeLayer1.filters = myFilters;

filter = new BlurFilter(2.5, 2.5, BitmapFilterQuality.LOW);
myFilters = new Array();
myFilters.push(filter);
treeLayer2.filters = myFilters;

var i=0;
for(i=0; i<4; i++) {
/*The value sent to tree(value) is the Y value at the hight of it’s curve.*/
myTree = new tree(280);
myTree.scaleX = .8;
myTree.scaleY = .8;
myTree.x = 20 + (200*i);
treeLayer1.addChild(myTree);
}
for(i=0; i<3; i++) {
myTree = new tree(300);
myTree.scaleX = .9;
myTree.scaleY = .9;
myTree.x = -20 + (300*i);
treeLayer2.addChild(myTree);
}
for(i=0; i<2; i++) {
myTree = new tree(320);
myTree.x = 50 + (400*i);
treeLayer3.addChild(myTree);
}
}

Adding the bunny to the stage is also really easy:

private function addBunny():void {
bunny = new rabbit();
bunny.scaleX = .5;
bunny.scaleY = .5;
bunny.x = 275;
bunny.y = 350;
stage.addChild(bunny);
}

Our clouds… since there aren’t ALWAYS clouds in the sky I figured I would only add a new cloud about 30% of the time every 5 seconds.

private function addCloud(event:TimerEvent):void {
if(Math.random() > .7) {
myCloud = new clouds();
myCloud.x = -100;
myCloud.addEventListener(Event.COMPLETE, handleOffScreen);
stage.addChildAt(myCloud, 1);
}
}

private function handleOffScreen(event:Event):void {
stage.removeChild(Sprite(event.currentTarget));
}

Also remembering to take care of the “complete” event that I dispatch from within my cloud object when it goes off stage.

Finally I just have to add my keyboard handling functions, which are really easy:

private function keyDownHandler(event:KeyboardEvent):void {
if(event.keyCode == 39) { //Right
if(!bunny.moving) {
bunny.scaleX = -.5;
bunny.moving = true;
bunny.play();
tree.vel = -4;
}
}
if(event.keyCode == 37) { //Left
if(!bunny.moving) {
bunny.scaleX = .5;
bunny.moving = true;
bunny.play();
tree.vel = 4;
}
}
}

private function keyUpHandler(event:KeyboardEvent):void {
bunny.moving = false;
tree.vel = 0;
}

There it is! I’ve given you almost all the code right there. And if you want more, then download ALL the code here: Springtime Animation Source Code.

http://www.clickpopmedia.com/2008/04/04/spring-animation-with-actionscript-3/


Subscribe to Blog Serba Lengkap.Semuanya Ada Disini ! by Email

DRAM Vendors Warn of Imminent Price Hikes

posted by : CarBari Tuesday, April 1, 2008 0 comments

SEOUL, April 1 (Reuters) - Samsung Electronics Co Ltd is considering a single-digit percentage increase in prices for computer memory chips in April, in a sign that a long and brutal industry slump may be ending.

Chu Woosik, executive vice president in charge of investor relations at the world's top maker of memory chips, told Reuters by telephone that the South Korean company was considering raising contract prices for dynamic random access memory (DRAM) chips—widely used in personal computers.

"We think we have hit a bottom" in the memory market, Chu said. But he added that current market conditions did not warrant a big price increase.

Samsung's comments come a day after Japanese rival Elpida Memory Inc said it aimed to raise the price of DRAM chips by 20 percent in April.

A small rise in the price of memory chips is unlikely to have a significant impact on the retail price of electronics due to small scale of the increase and the number of other components. But analysts dismissed talk of price increases above the level mentioned by Samsung.

Chu's remarks lifted Samsung shares 2.4 percent to 638,000 won by 0404 GMT, outperforming the wider market's 0.39 percent rise. Elpida's stock rose for another session, adding a further 9.3 percent.

Memory chip makers worldwide are grappling with oversupply and collapsing prices in DRAM chips. The sector's profitability has also been hit by steep price falls in NAND flash memory chips used in portable electronics.

The average spot price of the 512 megabit double-data rate two chip which runs at 667 megahertz stood at $0.93 each as of Monday, 69 percent lower than a year earlier, according to online chip clearinghouse DRAMeXchange.

The average contract price for the same type of chips was at $0.91 per unit in the second half of March, DRAMeXchange data showed.

Elpida on Monday said it hoped to negotiate with computer makers for a 10 percent price increase in its DRAM chips in the first two weeks in April and another 10 percent in the second two weeks, saying the current prices are not sustainable.

But Hynix Semiconductor Inc, the world's No. 2 memory chip producer, remained cautious.

"We will negotiate to obtain the best results in the current market conditions," Hynix vice president James Kim, in charge of investor relations, said when asked about contract prices.

Hynix shares rose 1.44 percent to 28,250 won.

SMALL RAISE SEEN

"A 3-4 percent rise in DRAM price could be possible," said Lee Min-hee, an analyst at Dongbu Securities, referring to Samsung's plans.

"The timing of the price rise seems a little early, but there is evidence that the contract market is tighter."

Lee, however, dismissed Elpida's 20 percent target.

"That is impossible. PC makers will refuse to negotiate."

PC makers echoed Lee's prediction.

"We don't think there is room for a 20 percent price increase for DRAM since supply and demand are balanced right now," said a spokesman for Taiwan's Compal Electronics, the world's No. 2 contract laptop PC maker.

"There is no reason to see such a big price jump and it won't be accepted by PC makers. If it's just a small increase then it shouldn't affect PC vendors that much, but it will make prices tighter."

Lehman Brothers, in a note on Tuesday, agreed that a bottom had been reached in the first quarter.

"The best time to buy memory names was 1Q08," the report said. "We belive the war in the DRAM industry is already over, with Samsung being the winner." (Additional reporting by Sheena Lee in TAIPEI, editing by Keiron Henderson and Louise Heavens)

Copyright Reuters 2007. All rights reserved. Users may download and print extracts of content from this website for their own personal and non-commercial use only. Republication or redistribution of Reuters content, including by framing or similar means, is expressly prohibited without the prior written consent of Reuters. Reuters and the Reuters sphere logo are registered trademarks or trademarks of the Reuters group of companies around the world.


Subscribe to Blog Serba Lengkap.Semuanya Ada Disini ! by Email

Dell and HP see laptop battery shortage

posted by : CarBari Saturday, March 29, 2008 0 comments

Iranians attend an electronics and computer exhibition presenting services by U.S. company DELL in Tehran October 29, 2007. Dell Inc said on Tuesday the personal-computer industry was experiencing a shortage of laptop batteries partly because of a recent fire at a major supplier, but the company was working with other suppliers to limit any price increases. (Raheb Homavandi/Reuters)
Reuters Photo: Iranians attend an electronics and computer exhibition presenting services by U.S. company DELL in Tehran...


SAN FRANCISCO (Reuters) - Dell Inc (DELL.O) said on Tuesday the personal-computer industry was experiencing a shortage of laptop batteries partly because of a recent fire at a major supplier, but the company was working with other suppliers to limit any price increases.


Dell, the world's second-largest PC maker after Hewlett-Packard Co (HPQ.N), also said prices of its separately sold batteries used as replacements or for surplus power had gone up because of the shortage caused partly by the March 3 fire at LG Chem's (051910.KS) Ochang plant.

LG Chem is the second biggest South Korean battery maker. The fire contributed to a worldwide battery shortage that could affect up to 40 percent of second-quarter shipments at Asustek Computer (2357.TW), Taiwan's No. 2 PC maker, an Asustek executive told Reuters earlier on Tuesday.

A spokesman for Round Rock, Texas-based Dell declined to give the percentage of total Dell sales attributable to separately sold battery packs, but the amount is likely to be minimal as Dell's main products are fully assembled desktop and laptop PCs and business server computers.

"We sell battery packs. The prices of those battery packs for people ordering extra batteries have gone up," Dell spokesman Jess Blackburn said, declining to say by how much.

He added that Dell is "not commenting on what impact, if any, that this is having on the prices of our products," referring to notebook PCs.

"The industry is experiencing battery supply constraints because of these problems," Blackburn added. "Therefore, pricing is being impacted by current availability. But we are working with our partners throughout our supply chain to reduce the impact on our customers.

LG Chem competes in the notebook battery business with Samsung SDI (006400.KS) and Japan's Sony Corp (SNE.N) (6758.T), among others. LG Chem has said it expected the Ochang plant to start production again in two to three months.

HP spokesman Mike Hockey said the company is in "regular communication" with LG Chem about the situation.

"The full extent of the impact to HP and other OEMs (original equipment manufacturers) is still being determined," Hockey said in an e-mailed statement. "We are aggressively working within the battery cell industry to secure additional supply of battery cells."

Macquarie Securities analyst Daniel Chang said first-quarter notebook battery supply was already constrained and that the fire had driven PC makers to other makers including Sony and Panasonic.

Notebook PCs accounted for 30 percent of revenue in Dell's most recently completed quarter, the same as desktop PCs. Software and peripherals, which include battery packs, made up 17 percent.

PC makers may be able to offset the rising cost of batteries with other components such as PC memory whose prices have been falling.

Citigroup Analyst Glen Yeung wrote in a February 29 report that Dell had likely built up memory inventory in its fiscal fourth quarter ended February 1, before the fire.

"Our checks suggest Dell did build DRAM (computer memory) inventories in their fiscal fourth quarter in response to low DRAM pricing," Yeung wrote. "Despite commentary from industry players, we suspect downward pricing will persist in March."

Analysts attributed an increase in Dell's fourth-quarter operating margin to lower prices for components including memory, which fell 40 percent to 45 percent from the fiscal third quarter, according to Citigroup analysts.

(Additional reporting by Sheena Lee in Taipei, editing by Richard Chang)

Installing Vista With No Product Key

posted by : CarBari Friday, March 28, 2008 0 comments

You can install Vista with no product key and have 30 days to evaluate it

  1. Boot from the DVD and start the installation
  2. Select the Language, Time and Currency, and Keyboard
  3. Click on Next
  4. Click on Install Now
  5. Don't enter a Product Key
  6. Uncheck Automatically activate Windows when I'm online
  7. Click on Next
  8. Click on No to confirm you do not want to enter a product key
  9. Highlight the version of Vista you want to install
  10. Check that it is the same edition you have purchased (if you want to enter in a product key at a later time).
  11. Click on Next
  12. Check accept the license and terms
  13. Click on Next
  14. Install a clean copy and continue as with a regular install